

Exporting Assets From Affinity Designer To Game
by Dixita Ganatra
Exporting assets for Android using Affinity Designer
Affinity Designer has a rich feature, Export Persona. I was wondering if it could ease the process of exporting assets for an Android project. Here's what I found after delving into it.
Preface
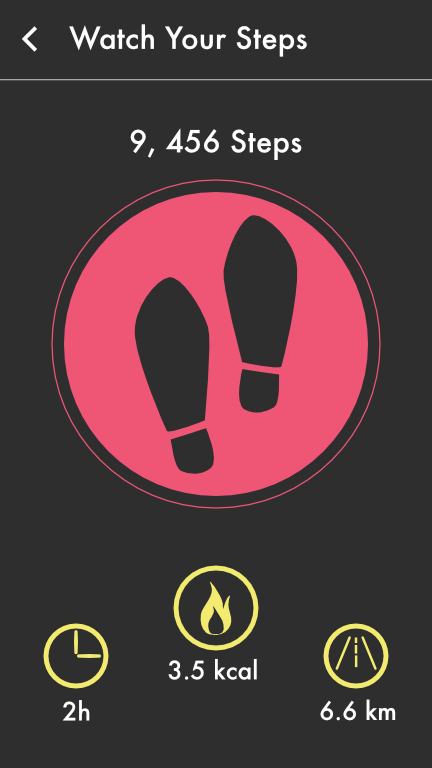
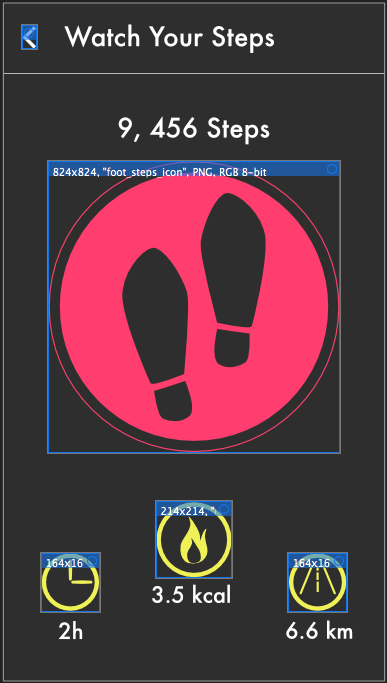
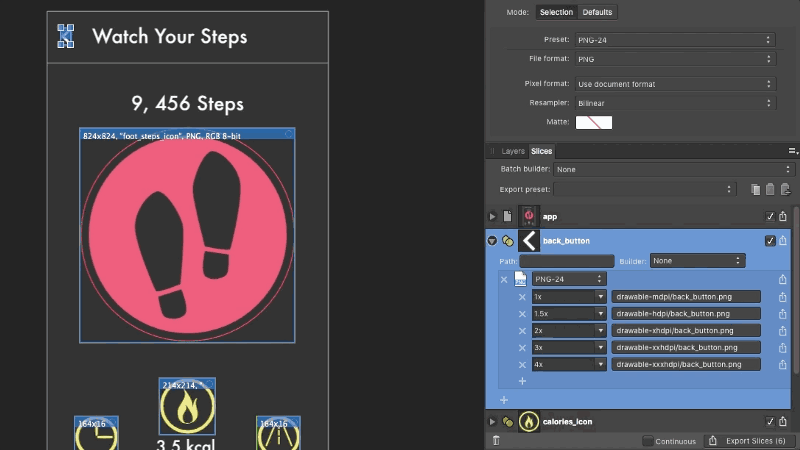
This article assumes that you are familiar with navigating around in Affinity Designer. I am going to use an example mockup of a fitness app called Watch Your Steps. This app counts your daily footsteps, the time you were active, the calories you burned, and the distance you walked.
To use these icons in an Android app, we need to export them. Since this application is going to run on Android devices with various screen sizes, we need to export them for various resolutions.
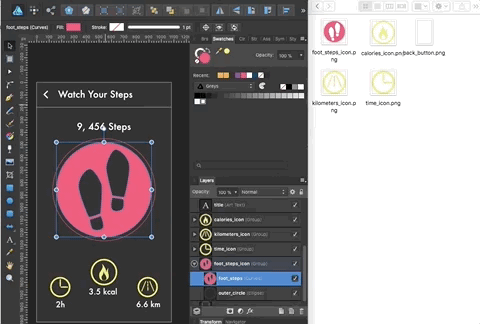
The Footsteps
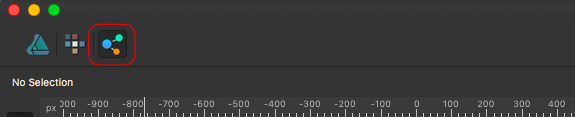
Step 1: When your design is ready, switch to Export Persona.
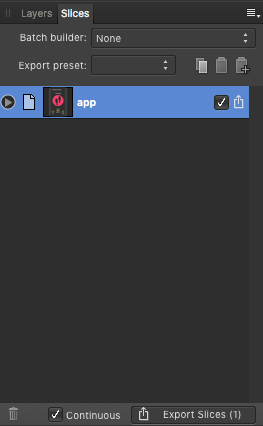
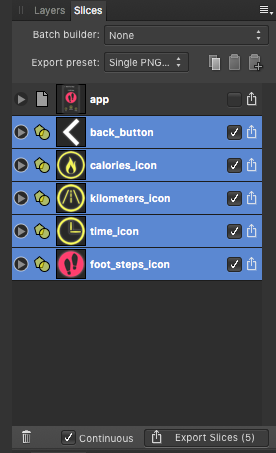
Step 2: Go to the Slices panel in the right pane.
To export icons, we need to slice them. Affinity creates a slice for our artwork by default. Now we need to slice the icons from our artwork. We will create slices from layers directly. We could use Slice Tool to create slices manually as well.
Step 3: Go to the Layers panel. Select the layers you want to export and click Create Slice.
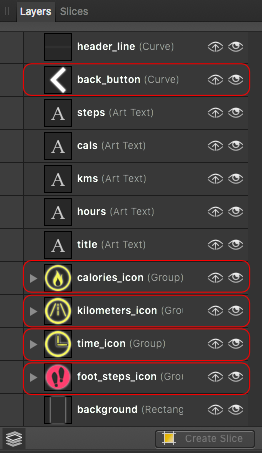
These are the layers which were created in Draw Persona. We are going to export the layers highlighted above. You should now be able to see blue borders around the sliced layers in your artwork indicating the slices created.
Step 4: Go to the Slices panel and uncheck the default slice (the app slice in this example) and any other slice(s) that you don't want to export.
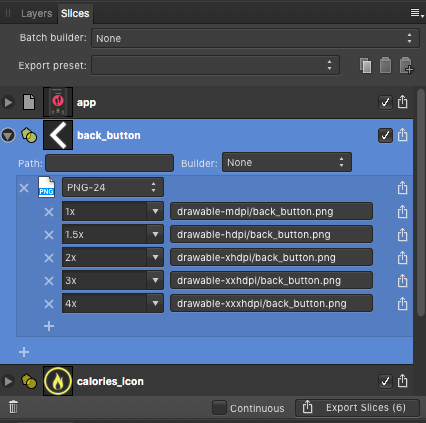
Step 5: Expand a slice by clicking an arrow in the left side and set the file path.
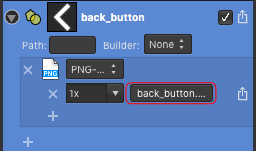
It shows the details of a slice. The highlighted area shows the file path of the expanded slice. Since we gave our layers proper names, we can reuse them for file paths.
By default, the size of the png will be 1x (same as of the icon). We need this size for drawable-mdpi in an Android project. Click on the file path, and perform the following steps to set it.
Remove Scale suffix (1x) from the filename and prepend drawable-mdpi/ to our file path (do not forget the trailing /). Because we want our asset to be in the folder drawable-mdpi/, named back_button.png.
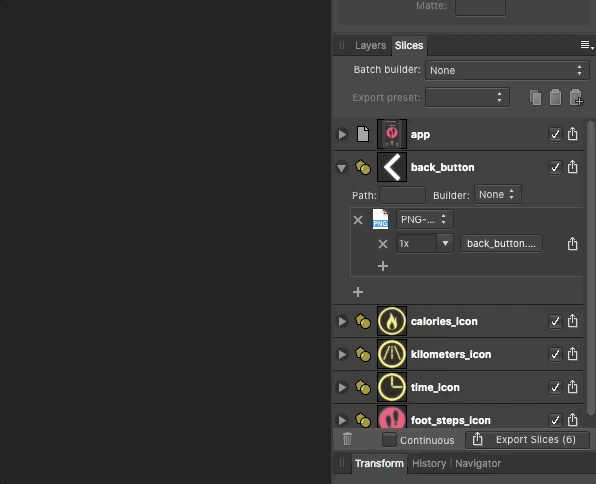
Step 6: Follow the previous step for drawable-hdpi — 1.5x, drawable-xhdpi — 2x, drawable-xxhdpi — 3x and drawable-xxxhdpi — 4x.
After completing Step 6, the slice will look like this:
We don't have to repeat this procedure for all the following icons. Affinity provides a feature to save this as a preset.
Step 7: Click on the menu icon from the top-right side of the Slices panel and select Create export setup preset. Then name it Android (or whatever you prefer).
Now we are ready to select the rest of the slices and apply the Android preset on them. ?

As you can see, once you create a preset it is extremely easy to apply on others.
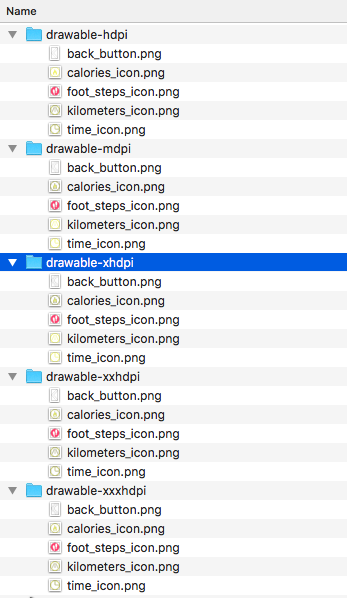
Step 8: Click Export Slices placed in the bottom-right. The icons will be exported within their respective folders. After exporting them, the folder structure will look like this:
What if we change the icons later? Do we have to export them again ??
No, we don't.
Bonus
Just check the highlighted option, Continuous.
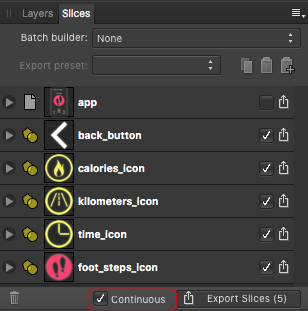
Now whenever you save your changes, exported assets will be updated continuously. Isn't it cool ??
That's all folks. Contact me if you have any ideas worth sharing. I would love to hear from you on twitter @dixita0607.
Application Mockup
You can download the mockup file used in this tutorial here ?.
watch-your-steps.afdesign
drive.google.com
References
Android Icon Reference Chart | The Icon Handbook
The Icon Handbook is a reference manual, how-to guide and coffee table 'showcase' in one. learn how to design icons for…iconhandbook.co.ukA Designers Guide for naming Android Assets
This article is mainly intended for Curious Designers and it will also help newbie developers but experienced…medium.com
Learn to code for free. freeCodeCamp's open source curriculum has helped more than 40,000 people get jobs as developers. Get started
Exporting Assets From Affinity Designer To Game
Source: https://www.freecodecamp.org/news/exporting-assets-for-android-using-affinity-designer-2564ecf53755/
Posted by: maherhiscam.blogspot.com
0 Response to "Exporting Assets From Affinity Designer To Game"
Post a Comment